Thursday, June 04, 2009
Some photos from my recent trips...
Hi again...I thought I would take a small break from layout updates and show some of my photos from 'workin on the railroad'...The shot above is from Fort Edmonton Park, with a 1920s - era 'Prairie' type 2-6-2 steam locomotive pulling a short train around the park.
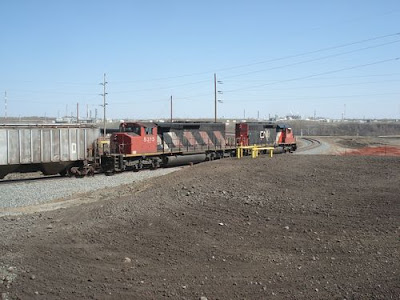
I was the engineer on a 'distributed power' train, hauling 18,000 tons of phosphate rock (originating at Kapuskasing Ontario) to the Agrium Redwater fertilizer plant. This is not far from Fort Saskatchewan, AB. We were waiting for local switcher assignment 512 to come off the spur and wye as it proceeded to Scotford Yard from the Agrium plant. Here we see a pair of SD40-2's on the point, with the leader actually designated as a SD40u rebuild.
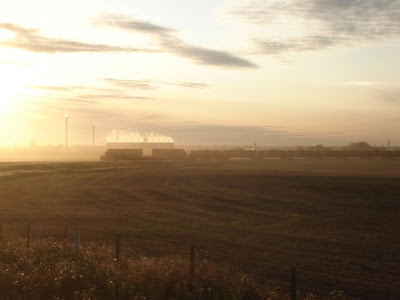
Sitting at Scotford on a westbound to Edmonton's Walker Yard. We are awaiting the arrival of assignment 514 from the Beamer Spur. Interesting shot, given the Sun was setting and the being very dusty with harvesting and combining in full swing last Autumn. The Dow Canada (Fort Saskatchewan) plant cooling towers (just above the locomotives) sort of add to the shot...
Enroute to Biggar, Saskatchewan with an eastbound doublestack train. This CP intermodal train was enroute from Edmonton, thru Hardisty AB and Wilkie SK to Saskatoon or points east. Nice to see they don't skimp on power! Note the unusual bridge design...maybe the deck truss was too short and they had to fill the gap with a very short trestle! Just west of Unity SK...
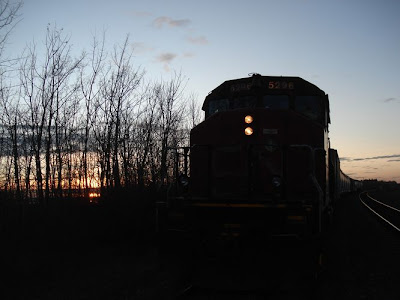
Let's carry on with sunsets. SD40-2(w) 5296 on the point of the Wabamun Turn at Wabamun AB. This is close to the location of the derailment I was involved with in August of 2005.
I am currently on assignment 442, which runs three times a week from Edmonton to a crew change point and small yard at Mirror AB. The train performs some switching at Mirror, then continues to Calgary's CN Sarcee Yard with a fresh crew. Here we see a pair of GP40-2L's and a WC GP38-2 on the point of a late 442 arriving at Mirror last winter. It was probably -35 Celsius or colder that night...
After close to 12 hours since we were called in Edmonton, we have train 713 ready for loading at the Ram River sulphur loading facility, 224 rail miles southwest of Edmonton. The plant crew will load over 10,000 tons of bulk sulphur destined for North Vancouver to be shipped to Japan. Note the full moon over the nose of the locomotive...
Another shot at Ram River showing the loading tipple...power was a GMDD SD75I and a BCOL Dash 8-40CW...
Final shot shows yours truly climbing back on the headend of train 516 from Whitecourt to Edmonton. We had just finished setting out SD38-2 1651 in the elevator track at St. Albert (my home town)...
Thanks for looking!
Ken.
Friday, May 22, 2009
May layout progress on the Kootenay Western
Hi again...I have been cruising along with scenery on my layout. I plan on having the layout ready for display during the upcoming NMRA Pacific Northwest Region meet in mid-September. Lots to do before then!
Some photos for your viewing pleasure...
These two photos are an overview of the completed scenery to date.New scenery base to the right of the bridges, including an access road and small parking lot...perhaps for some rafters to enjoy the white water of the river...fairly mild current, given it is mid-September on the layout...
Trackside view approaching Winfield siding from the south. Should look real good with more trees and various plant life...
Looks like those pesky beavers have migrated from Chris Lyon's layout to the Kootenay Western. Engineering forces may have to consider destroying the dam, before the water washes out the mainline!
Another view of the beaver pond. After the Kootenay Western roadmaster spoke with the animal control officials, it was decided to open up a small area of the dam to enable partial drainage of the backed-up creek...now to trap those beavers and to send them back to the Lyon Valley Northern! (freshly poured acrylic gloss medium...makes for the milky look)
The creek has collected into a small pond a bit downstream from the beaver dam. Here we see a culvert with a small brook draining into the pond...The water level is significantly lower than where it should be...gonna need a few more pours of acrylic gloss medium...sure like how the pond bottom detail shows!
Another view of the pond. I used actual water to trace the contour for the streams and the pond, then poked a hole in the bottom of the plaster to drain the water...worked like a champ! I then marked the 'high water mark' around the pond ( a lighter ground shade marks where the water was in the springtime...)
Freshly applied acrylic gel medium to simulate frothy, turbulent water at the base of the outflow creek. This will dry and cure (overnight) into being semi-transparent.
That's all for now! Hope you enjoyed this post!
Thursday, March 19, 2009
First post of 2009...Dirty deeds, done dirt cheap!
Hi to all...I must get on here and post more often! As the title alludes to, I have started to work on the scenery component for the layout. Some photos to show what I've been up to (with the help of our round-robin 'FRED' mini-group members...)
This is a 'before' photo of the Winfield (British Columbia) area. As you can see, I have done some more backdrop painting.
Some close-up photos of the backdrop...I might tone down some of the autumn colors, especially to the left of the log cabin in the 3rd photo...just a little too 'bright'!
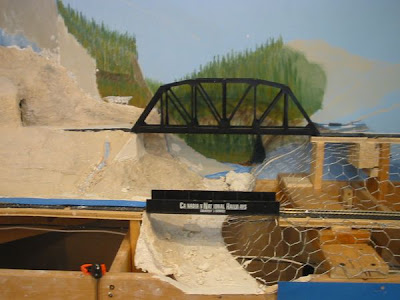
A 'before' photo of the river mini-scene. I wasn't happy with the arch bridge, so I decided to remove it and place a through truss bridge in its place...
This helps to fill in the corner of the room. A modest tunnel with a swift outflow creek (with rapids, cascading water and a waterfall or two), draining into a small pond, which in turn will drain into the mountain river. This is plaster cloth on top of chicken wire, with another coat of plaster painted with a sandy 'dirt' color. I determined the creek flow and pond contour by pouring real water (with blue tint) down the creek and into the pond. Worked like a champ...
A closer shot of the outfall creek. Note the rock 'castings', made out of scrap drywall mud chunks!
I tried to do some moderate rock outcrops with SculptaMold, carved to look like rock strata (foded and mangled), with a diluted wash of India Ink. I would say the result is satisfactory!
The river scene looks good...at least the one bank does! I went and did some more plaster carving with a dental pick, along with another shot of india ink wash, to bring out more rock relief around the tunnel portal. The wing abutment was scratchbuilt, with 1/8" FoamCore board, with a thin coat of drywall mud and stained with the india ink wash.
An overall 'chopper' view of the project to date. Hope you enjoyed the photos!
Ken.
Subscribe to:
Posts (Atom)